Everlasting Asparagus
Plant asparagus with care, and then harvest and harvest and harvest…
I have planted asparagus three times in my lifetime: First with my dad when I was about 12 years old — we continue to harvest asparagus from that bed. The second time was a small batch of Purple Passion that never really amounted to much because we had a terrible drought that summer. The third — and hopefully the last — was 100 crowns Andy and I set out in 2012.
Planting asparagus is an investment on all accounts: time, labor, money and patience. But the eventual payoff is big when you have fresh asparagus each spring right from your own garden. It took me about a week to recover from planting 100 crowns but that is ancient history because this year I have loads of asparagus!
Perhaps you are not interested in the volume of work and yield that 100 crowns offer, so maybe 25 planted in a permanent spot in the garden will suffice. Asparagus is a perennial so be certain about where you plant and be serious about preparing the planting bed. This is the hardest part but once it is done, it is done! Asparagus will continue to produce for 30 years or more if it is properly maintained; Daddy’s original planting is proof of that.
Prepare a 10-inch-deep trench that is about two feet wide; add lots of organic matter like composted manure, especially if your soil is clayey. We use a stagger pattern to plant the crowns: Imagine the paw prints of a cat and plant accordingly, spacing the centers of the crowns about 12 inches apart. To get asparagus started it is not a bad idea to add a little phosphorus into the mix, so I sprinkle a little bone meal into the trench before spreading out the roots of each crown as I plant. The crowns of asparagus look like an array of roots so spread them out as uniformly as you can. Cover the crowns with about two inches of soil, reserving the remaining soil for later. Planting asparagus takes on an accumulative effect as the roots establish and spears begin to grow.
Indeed, the unique thing about planting asparagus is that we add soil gradually over several weeks. Cover the crowns little by little as they emerge from dormancy and poke above the soil surface; that’s our prompt to add some more soil until we are once again even with the soil surface. Keep the plants evenly moist during this time.
The tried and true garden variety is Jersey Knight; a new and improved version is also available, called Jersey Supreme. When you purchase your asparagus crowns be sure to take note of how old they are. If you purchase 2- to 3-year-old crowns you can start harvesting a little by next year but it is best to leave them be during the first year so they can go straight to fern. At the fern stage the plant can maximize photosynthesis and pack in the energy to develop a strong root system and therefore higher yields next year. Harvest a little next year and then you should be ready to really enjoy a prolonged harvest by the third year after planting. Well-preforming asparagus beds can be harvested up to two months before stopping and allowing spears to go to fern for the rest of the season.
Long-term maintenance includes weeding (which, as a perennial crop, does become a problem after years in the same place; try using corn gluten as a pre-emergent). Also, don’t cut asparagus tops (the ferny growth) back until it has naturally died back; the plants need to store energy throughout the summer and fall, which is achieved through their foliage. This is critical for a good crop the following spring. Fertilization with a balanced organic fertilizer is done once the spears have grown to the fern stage.
In terms of controlling weeds we have tried it all: hand pulling, hand cutting, mower, fire and last year, the best ever: We let the sheep graze the patch, which really seemed to eliminate leftover weeds! If you have pest problems, burning it from time to time may help (the conditions must be right to get it ablaze, however). And, of course, only burn if you are safe to do so in proximity to others and to buildings. You can fertilize during active fern growth after the harvest season with composted manure or a balanced granular (I like the mixes that are organic, like Espoma’s product line, or make your own by mixing cottonseed meal, bone meal and kelp).
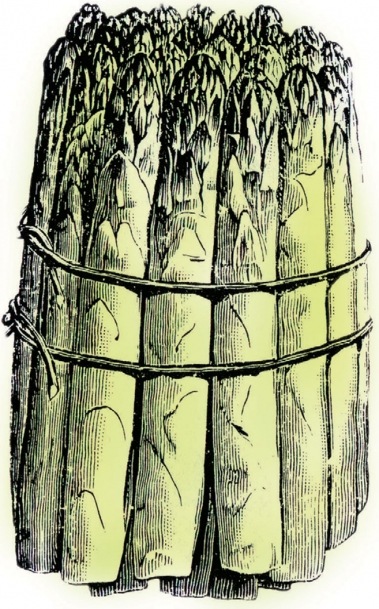
Asparagus season is certainly upon us and as I peruse Mother Earth News, Food & Wine and our own Edible Louisville this perennial garden vegetable takes center stage. The one thing that makes me crazy is that non-asparagus gardeners think that we must “choose thin spears” for our recipes. This is simply not true. I have been harvesting asparagus fresh from the garden for over 30 years and the fat spears are undoubtedly the most tender and succulent. Maybe if it had to travel 1,000 miles to arrive in Kentuckiana the cut end of a fat spear might be a little woody, but that is nothing that a strategically placed snap won’t remove (the woody end will snap off at the point of least resistance leaving you the more tender, edible remains of the spear). When we harvest straight from the garden a slice with our harvesting knife at ground level will almost certainly insure a tender spear from top to bottom.
So, I am going on the record and declaring that when it comes to homegrown asparagus (and even the wild growing in the fence rows) fat is good! The fat spears have always been tender from the garden so don’t let anyone fool you on the fresh-from-the-garden variety. Plus, the fat spears are particularly well-suited for the charcoal grill.
Tasty Tips
If you just have a few spears to harvest, use them raw in a salad. Use a vegetable peeler to shave thin slices of asparagus into a pasta or green salad.
You can preserve the spring flavors of asparagus by making a pesto (with nuts, olive oil and parmesan cheese) or a simple asparagus sauce suitable for freezing. Steam about 2 pounds of asparagus, let cool and blend in a food processor with 2½ teaspoons of lemon juice and a teaspoon of kosher salt. Freeze and use later with pasta, as a soup base or as a sandwich spread.
Primary Pests
The primary asparagus pests are perennial weeds. Mulching and hand pulling is the tried-and-true method of weed suppression, so stay on top of it. A secondary pest is the asparagus beetle, which can be found in its larval stage feeding on the tips of asparagus spears (where you can easily smash them between your forefinger and thumb). Removing old debris in early winter also helps to remove overwinter eggs.